

After you install a printer, you must also ensure that it's connected to your computer. You can add or connect to a printer in Excel by using the File and Print options. After you add the device, you can print either within the Print option or by using the keyboard shortcut, Ctrl + P.
Note
First, be sure that your printer is installed by using the printer manufacturer's instructions. For Windows setup and troubleshooting steps, see Fix printer connection and printing problems in Windows.
In this article
Connect to a printer
In Excel, select File > Print.
Tip
You can also use the keyboard shortcut, Ctrl + P.
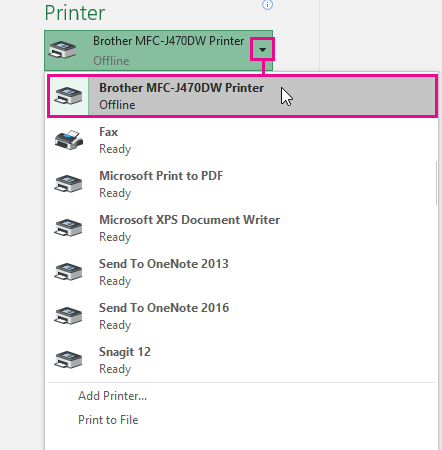
Select the Printer drop-down arrow and select the printer you want to connect to.
Add a new printer
If the printer you need to connect to isn't listed, add it.
In Excel, select File > Print.
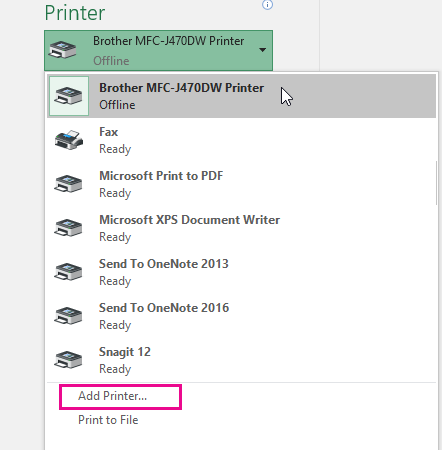
Select the Printer drop-down menu, and select Add Printer.
In the Find Printers dialog box, type the name of your printer in the Name text box. Select Find Now to search.
Tip
To search for all printers, leave the Name text box empty, and select Find Now. You can also type part of the printer name to search for it.
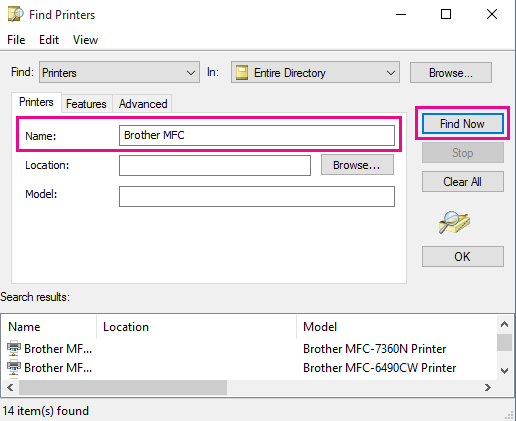
In the search results, select the printer, and select OK. This printer is connected, and your Excel document prints on this printer.
Set your default printer
For more information about how to set your default printer, see Set a default printer in Windows.