

Before you begin
To interact with agents in SharePoint, you need:
- A Microsoft Copilot license, or
- An organization that has enabled pay-as-you-go billing for agents in SharePoint.
Examples of using agents
By interacting with agents in SharePoint, you can intuitively interact with your site, pages, and files. This interaction enhances collaboration with your teammates. Here are a few examples:
- A recruitment specialist at the Department of Human Resources wants to quickly screen candidates for an after-school teacher position. They can ask the agent to create a table based on the resumes they have in the document library. This table can list each candidate's information, such as names, experiences, education, skills, and contact information. They can also ask specific questions about these documents, such as:
Among these candidates, who has worked in school settings? - A sales manager can use the product proposals and performance overviews to better understand the products and to communicate their benefits with potential customers: Give me a 5-minute elevator pitch about products X for me to present to the client next week.
- An instructional designer for the organization's professional learning and development team can create a course outline based on the files about a product: Please create a course outline for a one-hour long course to teach internal sales professionals about this product, and how to communicate its benefit with potential customers.
Start a chat with an agent
Sign in to your SharePoint site with your work or school account.
On a SharePoint site, page, or document library, select the Agent icon in the upper-right corner. The chat pane opens with the site's main agent, which the site owner chooses. The main agent is either Copilot or a custom agent.

Select a suggested prompt or enter your own question about the site or documents. For example, ask the agent to summarize documents, identify a project's point of contact, or provide the latest updates. Ask follow-up questions as needed.
Refer to specific files in chat
When you interact with an agent, you can add specific files in either of these ways:
In a document library, select the files, and then ask a question about them.
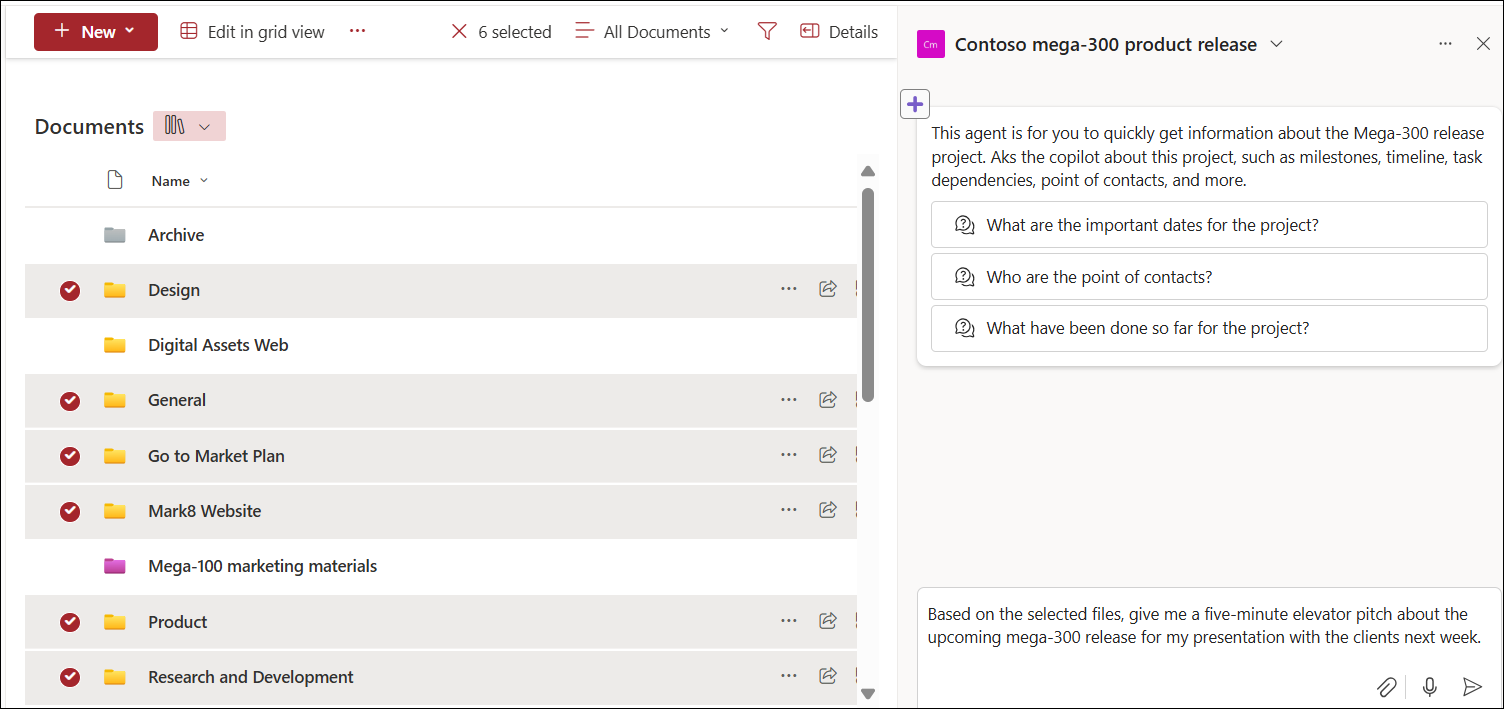
In the chat box, select the plus (+) icon or enter
/, and then select a file.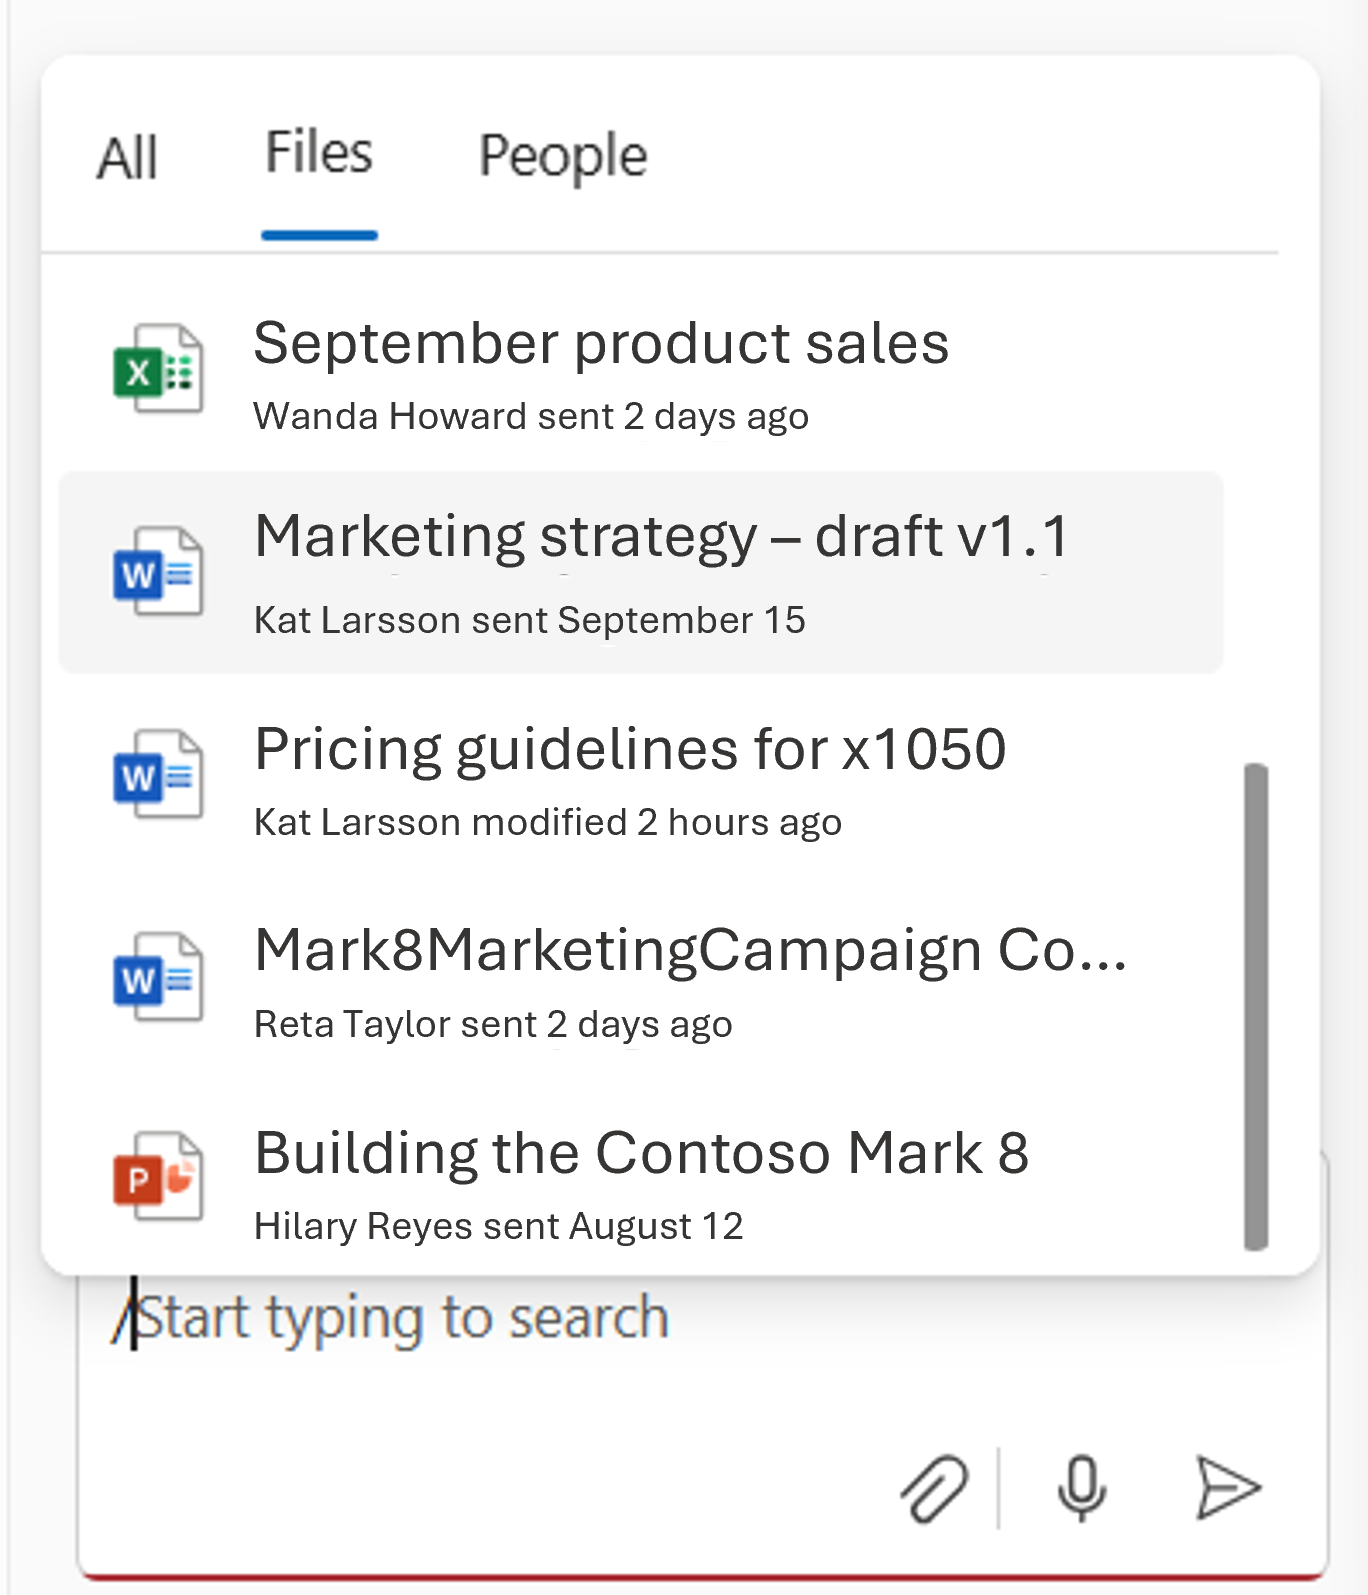
Manage your chat history
Only you can see your chat with agents. You can rename a chat history item. When you choose a chat history, the current agent switches to the agent used in the chat history.
You can delete your chat history from the chat pane. You can choose to delete chat history for a specific conversation, or you can delete chat history for all chats.
Supported file types
Currently, you can chat with agents in SharePoint about files in the following file types:
- Office documents: DOC, DOCX, PPT, PPTX, XLSX
- New Microsoft 365 formats: FLUID, LOOP
- Universal formats: PDF, TXT, RTF
- Web files: ASPX, HTM, HTML
- OpenDocument formats: ODT, ODP
Support for the following file formats is coming soon:
- Images
- Meeting recordings and other videos
- OneNote notebooks
Agents in SharePoint also support selecting pages or lists. From the file picker, you can select specific ASPX pages from the Site Pages library. Similarly, there will be a pivot within the picker window to select specific lists from that site.
Note
- Agents only respond to your questions by using information from sites, pages, and files that you already have access to and that are included as the agent's sources. Because of this condition, your answer from the agent might sometimes be limited. If you need more access, contact your site admin.
- When a SharePoint hub site is included as the source for the agent, it automatically includes its associated sites. Your agent uses information from both the hub site and its associated sites to respond.
FAQ and data handling
To learn more about agents, see Frequently asked questions.
For more information on how Microsoft Copilot works, see Data, Privacy, and Security for Microsoft Copilot.