

You can edit an agent so that it's tailored to your team's needs by:
- Customizing its branding and purpose.
- Adding or removing which sites, pages, lists, and files your agent should include as knowledge sources beyond the current SharePoint site.
- Refining the agent's behavior by writing customized prompts tailored to the purpose and scope of the agent.
Before you begin
To edit an agent, you must:
- Have a Microsoft Copilot license, or belong to an organization that has pay-as-you-go billing enabled for agents in SharePoint.
- Have edit permissions on the SharePoint site and the agent file.
Note
The agent only answers your questions using information from sites, pages, and files that you already have access to and have included as the agent's sources. To get information from all the sources you want the agent to use, you may need to update permissions for yourself or the people you want to share the agent with.
Open an agent for editing
You can open the agent builder from any of these locations:
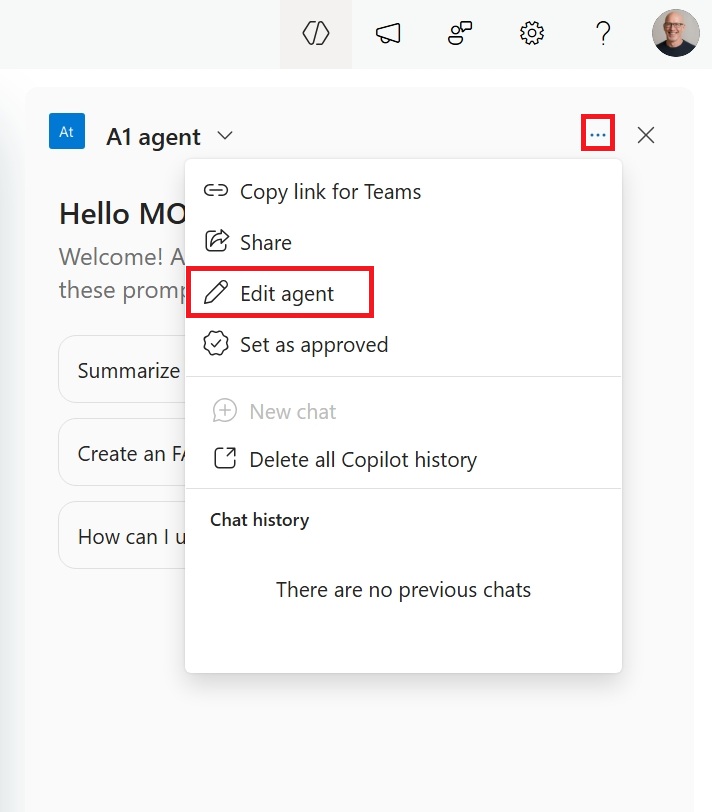
In the SharePoint agent chat pane, select the agent, select the ellipsis next to it, and then select Edit agent.
Find the
.agentfile, open its context menu, and then select Edit.
You can also start editing while using the agent in Microsoft Copilot Chat or Teams.
Customize the agent's identity
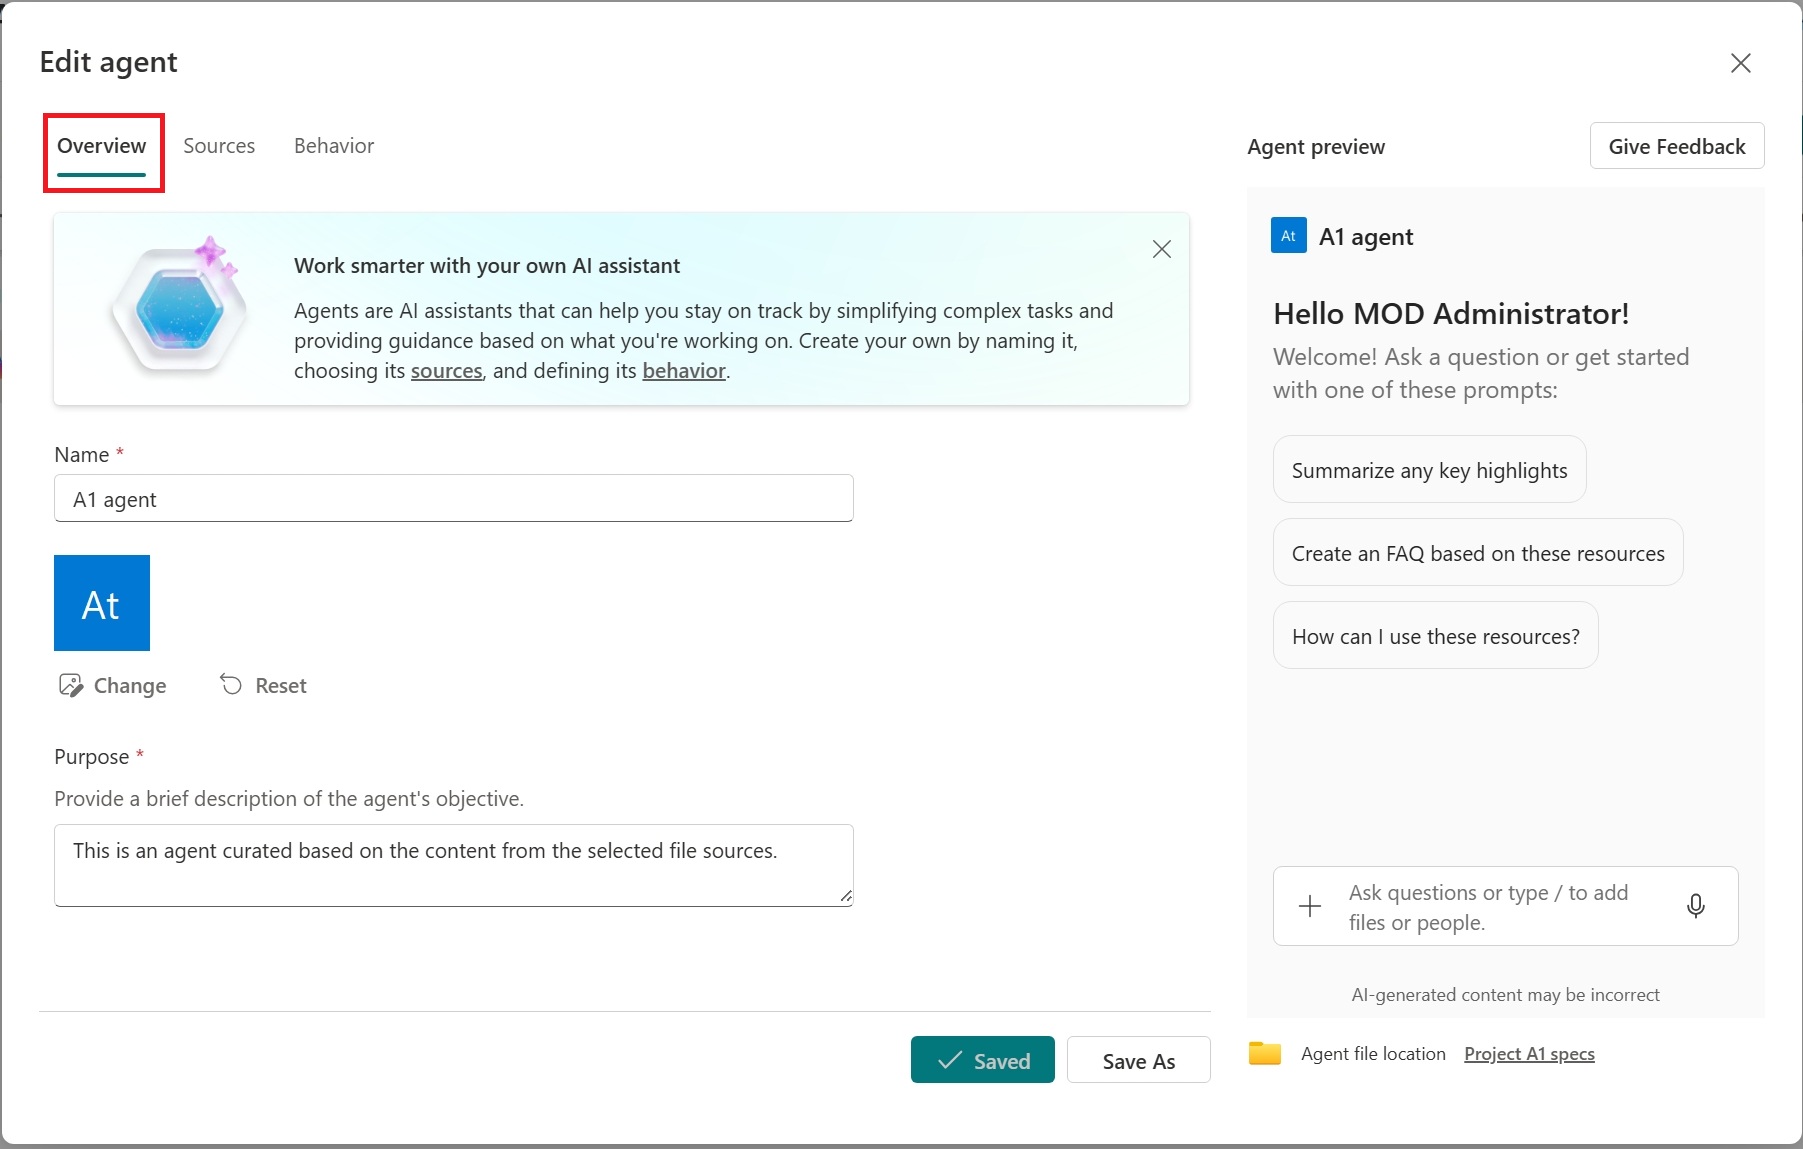
On the Overview tab, update the agent's name, icon, and purpose. Use the purpose to explain what the agent does and how people should use it.
Specify the agent's knowledge sources
On the Sources tab, add or remove SharePoint sites, document libraries, folders, pages, lists, and files. Search by site title, enter a URL, or select From OneDrive. People who use the agent receive information only from sources that they already have permission to access.

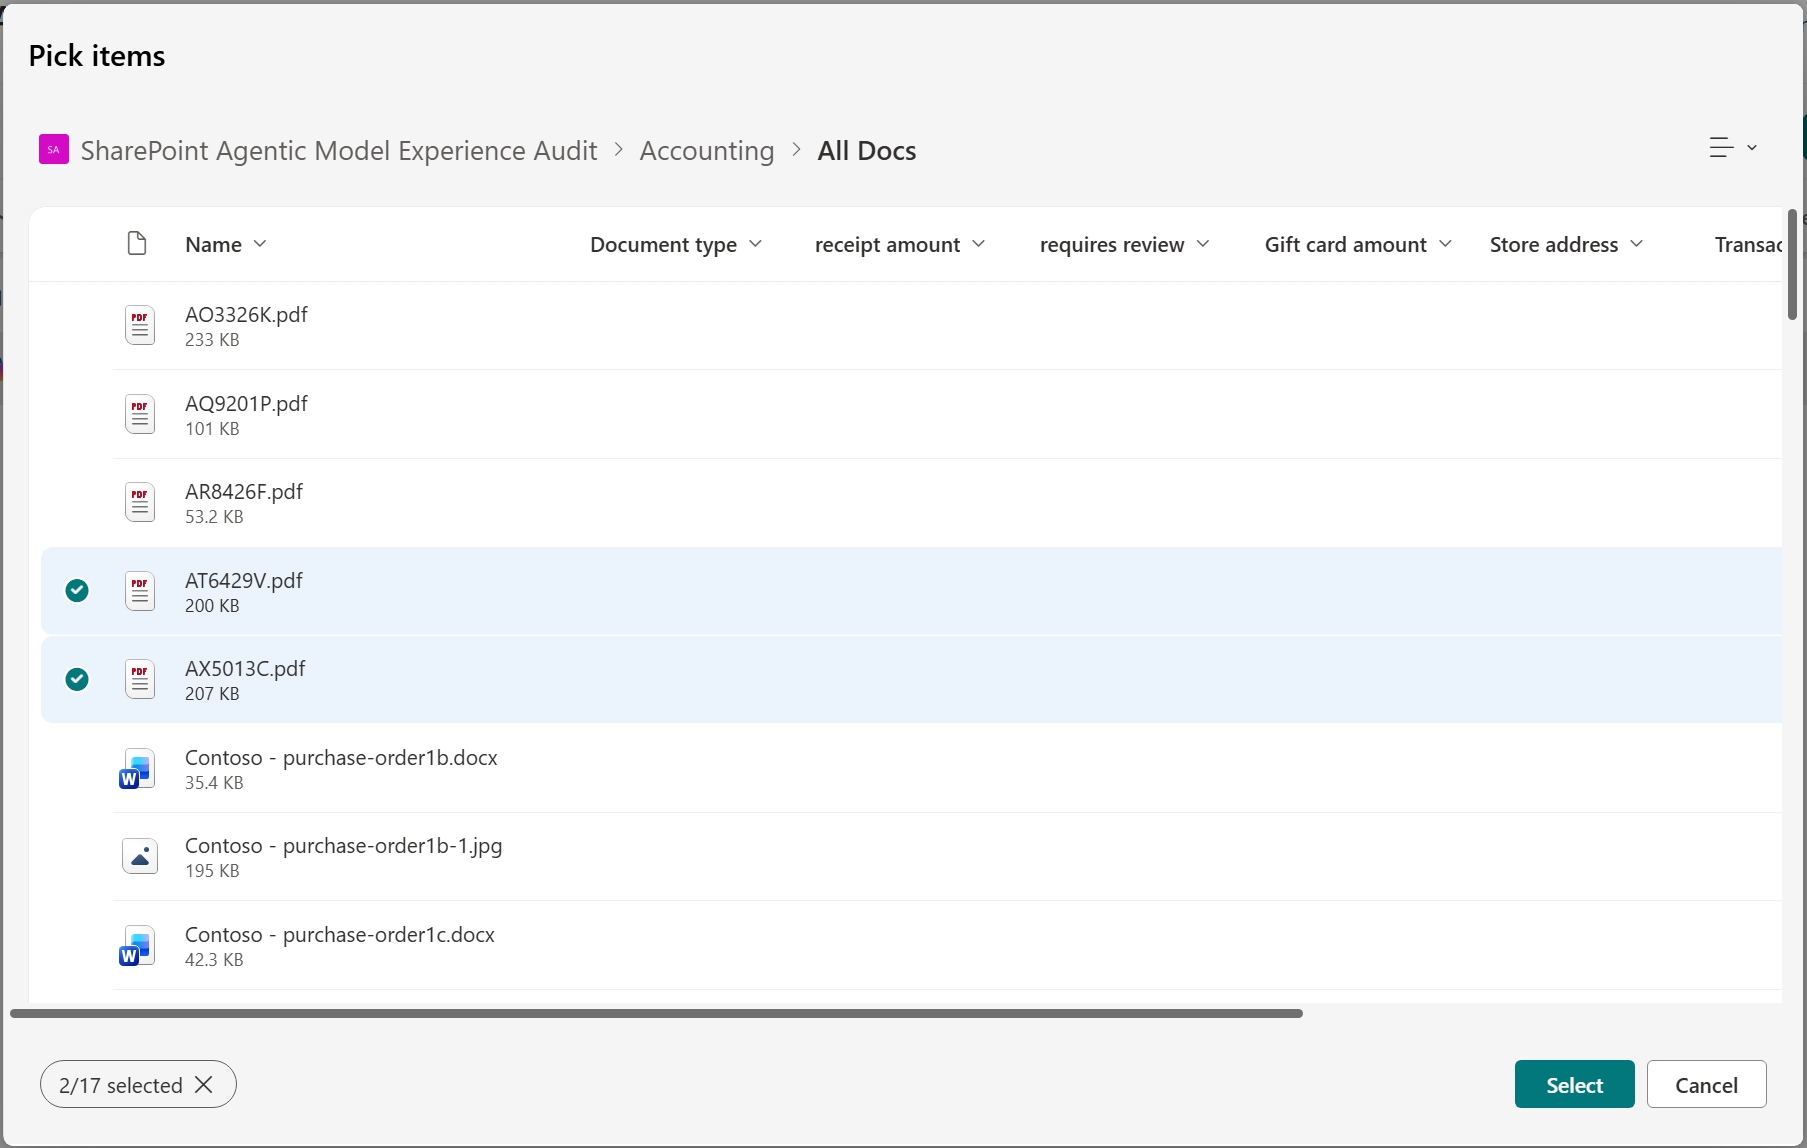
Your agent starts searching for information within the sources you select but might refer to its broader knowledge to provide complete and consistent answers. Use the toggle to have the agent prioritize the selected knowledge sources in such cases.
Refine the agent's behavior
On the Behavior tab, enter a welcome message, starter prompts, and instructions for the agent. Use the agent preview to test the agent, and adjust the instructions and starter prompts as needed.

Select Save and close. The updated agent is then available to use in SharePoint and share with others.
Note
- When a SharePoint hub site is included as the source for the agent, it automatically includes its associated sites. Your agent uses information from both the hub site and its associated sites to respond.
- When you share an agent with others, ensure they have access to the sources for optimal experience.
FAQ and data handling
To learn more about agents on SharePoint, see Frequently asked questions.
For more information on how Microsoft Copilot works, see Data, Privacy, and Security for Microsoft Copilot.